Monday, May 28, 2012

Miner's Lettuce Smoothie

It's not too late to gather miner's lettuce. The lowland varieties are flowering now, which isn't a problem in terms of taste, though as the season progresses they'll get increasingly pocked and leggy. Turn your attention to the mountains, where higher elevation varieties are just coming on line.

While gathering vanilla leaf the other day at around 3,000 feet on the far side of White Pass, I found good quantities of what I assume is Siberian miner's lettuce (Claytonia sibirica). It certainly looks like Siberian, though a commercial forager I know refers to it as alpine miner's lettuce. This is an especially succulent variety, with bright red coloration near the base of the stem and thick, crunchy leaves. I found it growing in the flood plain of Indian Creek, right out of the gravel, where it could be easily hoisted by hand and snipped off at the base, unlike woodland varieties which are frequently lassoed up with other plant life.

After surfing around the web in search of new recipes to make with miner's lettuce, I came across a site devoted to raw foods, with several smoothie recipes featuring wild ingredients. My daughter Ruby is a fan of smoothies, often putting a big glass of the stuff away before school in the morning. Smoothies are both a great way to deal with leftover fruits and yogurt, and a way for parents to disguise nutritious foods that might otherwise get snubbed. Into the blender went some vitamin c-packed miner's lettuce, in case scurvy was going around at school.

1 cup miner’s lettuce
1/2 ripe pear
1/2 ripe banana
1/2 cup blueberries
1/2 cup plain yogurt
1/4 cup milk
Yields 1 tall smoothie

This smoothie retains a bit of the wild green bite that you'd expect from the miner's lettuce, but the fruits—the banana in particular—tone it down so that the flavor is fresh, sweet, and probably unlike anything you've tasted before. Happy Memorial Day everyone!


Monday, May 21, 2012

Vanilla Leaf Tea

If you have spent even a little time wandering lower and mid-elevation trails in the Pacific Northwest, you've seen vanilla leaf (Achlys triphylla), a common native plant that can grow in lush, luxuriant carpets of jaunty green on the forest floor.

Now is the time to collect some. As snow melts in the mountains, the woods awaken from their winter slumbers and begin to stir with energized green shoots of all kinds. Sometimes the forest floor looks like it has a bad case of bed-head after the snowmelt, all matted and olive drab. But fast-growing greenery like vanilla leaf brings a sense of alert vitality back to the woods, a vitality that I try to incorporate myself this time of year.

When you find a good dense patch, it doesn't take long to collect enough for a year's supply of tea. Just grab the young leaves in bunches and snip the stalks with kitchen shears. When you get home, you can trim the rest of the stem if you prefer. The other day I filled a couple garbage bags, most of it for Jeremy Faber over at Foraged and Found Edibles. He uses the vanilla leaf in several wild tea mixes that he sells at Seattle farmers markets. Jeremy had a good laugh when I told him I averaged about 45 minutes to an hour per bag; he picks the stuff about three times as fast. And I must have cut myself in at least three places with the scissors. Good thing I don't usually forage for pay!

Native Americans used vanilla leaf as an insect repellent and to perfume their homes. Once in the dehydrator, the plant's common name rings true: the room fills with the slightly sweet and calming aroma of vanilla. As a tea, it has the same affect. Vanilla leaf tea is not like stinging nettle tea—it doesn't announce itself loudly at the door as a nutrient-laden heal-all with punch. It's more laid back, with a reserved herbally essence that's mellowed by the hint of vanilla. Really, it's a wonderfully soothing tea, like a chamomile. You can adjust the flavor to suit your own taste by mixing in other wild ingredients such as rose hips.


Tuesday, May 15, 2012

Sustainable Eats May Challenge

Over at Sustainable Eats, where you can find the excellent new guide The Urban Farm Handbook, with advice and helpful tips on everything from backyard chickens to container gardens, May has been officially deemed the Foraging Challenge Month. Take the challenge to learn some useful new skills and give yourself a chance to win prizes.

Here's the deal. Make a meal in which all the main ingredients are wild and/or foraged. It's that simple. Then, at the end of the month, leave a comment on the Sustainable Eats blog about your experience to be included in a prize drawing. Even better, include a link to your own blog post about a wild and foraged meal.

Prizes include a copy of my book, Fat of the Land: Adventures of a 21st Century Forager; Jennifer Hahn's book, Pacific Feast: A Cook’s Guide to West Coast Foraging and Cuisine; and Hank Shaw's book, Hunt, Gather, Cook: Finding the Forgotten Feast. Speaking of Hank, last week over at the Hunter Angler Gardener Cook blog, he offered his own foraging challenge: go find morels.

If you're new to foraging or always wanted to give it a try, this is a good month to get your feet wet. Across the continent, May is bursting with wild greens, spring mushrooms, and, depending on where you live, fish and shellfish. In my neck of the woods, we have the return of iconic runs of spring run chinook, known as springers, considered the tastiest of all salmon because of their high fat reserves. In addition, the Alaska salmon fisheries kick into gear with Copper River sockeye and chinook. May also marks the last razor clam dig of the winter/spring season in Washington as well as the first spot prawn opener. There's usually a tide low enough to dig for the wily geoduck. In the woods, meadows, and city lots, edible weeds are popping up everywhere, not to mention native greens such as fiddleheads and miner's lettuce. And let's not forget those wild spring delicacies, morels!

For my own challenge meal, I joined 14 high school students and two teachers last week to cook a wild feast after several days of foraging around Seattle and beyond. This is the second year I've been invited by the Bush School in Seattle to teach a week-long "experiential" class. Over the course of the week we visited a state forest to forage for native greens, picked weeds in an urban park, went clamming in South Puget Sound, and even hopped over the mountains to find a couple pounds of morels just as the mushroom season was kicking into gear.

On the last day we cooked up our harvest. Or rather, the kids processed and cooked the feast. Our meal is testimony to the varied and delicious menu that can be put together with a little knowledge of one's own habitat and some healthy tramping around in the outdoors. On our menu:

Yours need not be so extensive. Just make sure the main ingredients on the plate are wild and/or foraged. Things to think about after you harvest (or purchase), cook, and eat your wild meal: How did it taste? Anything different? Was it worth your time and effort—and if so, why? Take the Foraging Challenge!


Monday, May 7, 2012

Quick Asian Pickled Fiddleheads

Here on the West Coast, we pamper our ladies. Fie on you East Coasters with your easy-to-please ostriches! Alas, it is true: lady fern fiddleheads, should we not treat them with the utmost care and respect, can leave a bitter taste in the mouth, their delicate beauty notwithstanding.

Bitterness. It's a state of mind, you say. Bitter is as bitter does. Easy for an ostrich eater to say. The fact is, us West Coasters have no choice but to pamper. It's part of the contract. Otherwise we're sure to be disappointed. It happens in restaurants all the time. "They looked so cool on the plate...I thought they'd taste better."

The bitterness in ladies varies significantly from patch to patch, for reasons that I can't begin to understand. If you find a patch of lady fern fiddleheads that's less bitter than others, hold tight to that patch!

The next best thing is to use them accordingly. Like with this very simple pickling recipe. It's a "quick pickle" deal. I've used other pickling recipes in the past for fiddleheads, but this is my new favorite for its ease, texture (i.e. crunch), and a perfect balance between salt and sweet. Perhaps more importantly, any bitterness is miraculously vaporized in the marriage of flavors.  One of the benefits of the quick pickle method is that the fiddleheads aren't subjected to a withering hot water bath. The obvious downside is that you can't keep them on hand for months at a time, at least I don't think you can. So far I haven't been able to keep any on hand for more than a couple days.

2 packed cups fiddleheads, cleaned
1 cup rice vinegar
1 tsp salt
1/2 tsp sugar
2 half-pint jars

A note on cleaning fiddleheads: It's imperative that you remove as much of the brown, hairy, and bitter-tasting sheath that adorns the fiddlehead as possible. The easiest way to do this is to first run the fiddleheads under a strong tap, then immerse in a bowl of water and work them with your fingers, emptying and filling the bowl periodically to discard the residue. Finally, clean each fiddlehead individually between thumb and forefinger for a few seconds. The cleaner the better. Neatly trim the ends afterward.

1. In a pot of salted water, parboil cleaned fiddleheads for 1 minute. Drain and shock in cold water before draining again and removing to paper towels.

2. Mix pickling brine of rice vinegar, salt, and sugar.

3. Pack 2 half-pint jars with fiddleheads and cover with pickling brine. Refrigerate overnight.


Sunday, April 29, 2012

Maple Blossom Fritters

Like squash blossoms, the racemes of bigleaf maple trees can be transformed into a surprising culinary confection. Does frying them up in batter and sprinkling with powdered sugar have anything to do with it? You decide.

The maples where I live are too far along now for harvest, but higher up in the Cascade foothills I found plenty that had just blossomed the other day. You want to get the racemes just as they emerge from the protective red sheath that guards them and the unfurling leaves. At that point the racemes will be compact and tightly clustered; as they blossom, the flower-clusters become large, elongated (several inches or more), and some of the older flowers will have cottony material inside. The newly emerged racemes are easier to work with and make a daintier presentation.

Picking bigleaf maple racemes can present a challenge. On bigger trees the blossoms will often hang tantalizingly out of reach. Look for smaller trees or trees growing on a slope—or nab the blossoms from a bridge or overpass.

The taste of bigleaf maple blossoms is subtle: slightly nutty with a hint of sweetness. I've used them in the past to make pesto. The most common use is for fritters. My recipe is adapted from Poppy chef Jerry Traunfeld's, which can be found in Jennifer Hahn's excellent wild food resource, Pacific Feast. I used less water for a slightly thicker batter. Even so, this batter is very tempura-like. It's thin, drippy, and puffs up around the blossom upon hitting the hot oil. This makes for a light, chewy, beignet-like fritter that's perfect for breakfast, as a dessert course, or, with the smaller blossoms, as an adornment to pudding or crème brûlée. As with beignets, it's best to serve right away while hot and crispy.

2 - 4 cups blossoms
2 cups flour
2 tsp baking powder
2 tbsp corn starch
2 cups ice water
vegetable oil
powdered sugar

1. Check blossoms for insects. Usually they'll evacuate after their hiding place has been plucked.

2. Sift together flour, baking powder, and corn starch in a large bowl.

3. Stir in ice water.

4. Heat 1 inch of vegetable oil in a large saucepan on medium-high until a drop of water crackles and pops. Dredge blossoms in batter, allow excess to drip off, and carefully place in hot oil. Don't crowd the pan. Fry until lightly browned all over. Remove to paper towels.

5. Serve immediately while hot with a sprinkling of powdered sugar.

Note: I discovered on this occasion that I'm allergic to the pollen of big-leaf maples. After a few minutes of working in the kitchen with the blossoms, I was sniffling and my eyes were a red, teary mess. The upside is that this solves a recently developing mystery for me.


Sunday, April 22, 2012

Backyard Spaetzle

Seems you can't swing a dead cat in Seattle without hitting a restaurant serving spaetzle. This has been a developing trend over the last few years—and I'm all for it. Whether you call it pasta, dumplings, spaetzle, or any number of other names from around the globe, the combination of flour with water, egg, or milk is pure comfort. As a delivery vehicle for other good flavors—wild mushrooms, herbs, or even weeds—rustic pastas like spaetzle are unparalleled.

I'm a fanatic for homemade Italian pastas, though sometimes you don't have the time or energy to devote to a well-executed ravioli, or even tagliolini. In our family we've been making a simple dish we call Polish Dumplings for years to satisfy the flour-and-egg yen. It's quick, easy, and delicious in a hearty chicken or vegetable soup. This same recipe can be repurposed without any extra effort to make something just that much more delicate and special. Spaetzle (also spelled spätzle) is really just a pile of tiny dumplings. There's something about the mouth feel that's addictive. Whereas dumplings are chunky and filling, spaetzle is light and tender.

Just about any occasion can call for spaetzle, even an afternoon of weeding in the yard. I pulled a couple of my favorites for the table: bittercress and dandelion greens. Back in the disaster zone that is our kitchen, I couldn't find our cheap spaetzle maker so I resorted to a colander, and while you'll see many recipes that suggest this method as an alternative, it's really not the way you want to go. Buy an inexpensive spaetzle maker; you'll make more spaetzle.

I used half the dough to make spaetzle and the rest for basic dumplings.

1 1/2 cups flour
1 tsp salt
2 eggs
1/2 cup milk
1/2 cup finely chopped weeds or herbs

1. Put a pot of water on the boil. Whisk together eggs and milk in a small bowl.

2. Measure flour and salt into a large bowl, then add egg-milk mixture and chopped weeds and stir together with a fork until ingredients are mixed but not overly so. The dough should be sticky.

3. Salt boiling water generously. Press dough through spaetzle maker (or a colander, if you must) directly into boiling water.


For larger dumplings like these steaming on a plate (above), just pull gobs of dough off a fork and allow to fall directly into the pot. Both spaetzle and dumplings are ready when floating on the surface. It doesn't take long.

For my daughter's portion, I melted a pat of butter on top and grated some fresh parmesan cheese. Ruby liked it just like that, but you could serve it as a side dish or top with a meat or wild mushroom ragu. Spaetzle is a self-starter and plays well with others.


Friday, April 13, 2012

Comments, Money & Grumps

Dear Readers,

Recently it has come to my attention that the infernal spam bots have taken a liking to FOTL. They're sneaky—they attach their junk to older posts. I spent hours the other day weeding them off the site. Too bad they have no nutritional value like true weeds. As a result of this hassle, I've switched the comments from unmoderated to moderated. The upside is that I'll intercept the spam at the gate; the downside is that you might need to wait a few days to see your comment if I'm in the field or traveling.

While slashing down the spam, I noticed that there were quite a few comments I'd never seen before. Because this blog is seasonal, certain topics tend to come up year after year (e.g. dandelions in March). I'll try to address unanswered questions/concerns in future weeks.

I also came across a few rather grumpy comments about "commercial" aspects of this blog. Perhaps you've noticed that there's no advertising here, unlike many blogs in the 'sphere. This is by choice. (And by the way, I don't begrudge any blogger who tries to monetize their site in a relevant manner.) I've chosen to not take ads in order to reduce clutter and because, frankly, I don't think advertising would earn me enough income to justify the effort. I know other bloggers who make a tidy sum in advertising each month because of their excellent and popular blogs.

That said, I need to make a living and this blog is part of my work. Many of my readers are grateful to know about upcoming workshops and lectures; if you're not among them, I ask for your patience. It's my opinion that the occasional post about such events hardly constitutes a mercenary backslide into crass commercialism, but we all have our own definitions. One reader told me such posts only belonged on web sites, not blogs. This seems to me to be slicing it awfully thin. In any event, I plan to take that reader's advice at some point in the future and start a site. Until then, relevant info about upcoming trips, workshops, lectures, readings, and so on, will appear on this blog from time to time.

Thanks to my faithful readers for your interest and support.

—The Management

Thursday, April 5, 2012

Bay Area Bounty

West Marin at the end of March is a trip into Eden. The headlands have greened up from winter rains (admittedly spotty this year), the rivers run high, and the woods and meadows overflow with a riot of tangled undergrowth, much of it edible.

More than 20 years ago, when I lived briefly in Berkeley and San Francisco, I heard stories about Bolinas. Tucked away on a thumb of land south of Pt. Reyes and between the Pacific Ocean and Bolinas Lagoon, the community shunned conventional ways. The funny-looking locals farmed funny-looking crops in funny ways. Heck, maybe they even foraged (gasp!). This led to busloads of tourists wanting pictures of the native wildlife. Whenever the county erected a sign tipping off lookey-loos to their whereabouts, the locals tore it down. There's still no sign today, but the tenets of organic farming that began largely in this valley are now practiced all over the country; local artisan food makers are celebrated across the land for their award-winning breads, brews, cheeses, meats, and preserves; and foraging is just another common sense way to gather fresh, healthy food.

This past weekend, thanks to organizer Marin Organic, I joined with a few dozen food and outdoor lovers from all over the Bay to wander among the stunning beauty and bounty of Bolinas. [Listen to a radio story about the event here.] Kevin Feinstein, co-author of The Bay Area Forager, was on hand to share his local wisdom, and we were fortunate to have a few practicing chefs (plus eager students) to help with the afternoon feast. The weather looked ominous. Driving over Mount Tam, my rental car shook violently in the wind. Rain blowing in off the Pacific slashed sideways at my windshield. But by the time we poked our heads out from under the eaves of the Gospel Flat Farm stand, the rain had subsided and the sun was working hard to shoehorn clouds out the way.

Andrea Blum Photo
We all walked across the street to the Star Route Farms property that would be our primary hunting ground. Normally I wouldn't be enthusiastic about picking wild foods next to a farm, but Star Route has been organic for nearly four decades, and it shows. The rows between crops are loaded with weeds—healthy, nutritious, delicious weeds—weeds that get harvested right along with the domestic vegetables. [See top photo.] We picked nasturtium flowers, wild radish seed pods, mallow, cat's ear, and other weeds before climbing up into the wet jungle that rises above the farm, protecting its watershed with a forest of native trees and a host of native and non-native edible plants.

Robust patches of miner's lettuce forced us to choose our steps carefully lest we trample a good food source. The stinging nettles were tall, nearly too tall for harvest, so we snipped the tops of the youngest, tenderest plants. Chickweed flourished among the miner's lettuce. Huge thickets of thimbleberry, already budding out, towered above us on the hillside, and red elderberry in flower hung overhead. It was an orgy of wild foods. Kevin pulled a few thistles from the damp soil and demonstrated how to peel the lower stalk and boil the root (note to self: I really need to do a dedicated thistle post one of these days).

Andrea Blum Photo
Back at Gospel Flat we turned our attention to processing and cooking our catch. Everyone happily pitched in. The wine flowed. Kevin prepared a taste test of thistles, both raw and cooked, while the rest of us worked on the three main dishes of the day: oysters, soup, and salad. An appetizer of pan-fried oysters donated by Tomales Bay Oyster Company, dressed with a homemade aioli (thanks Kerry!) on Brick Maiden Bakery baguette, was devoured on the spot. Next came an enormous salad of miner's lettuce, chickweed, cat's ear, mallow, nasturtiums, wild onion, wild mustard flowers, and wild radish seed pods that filled an entire wash basin. Toasted walnuts, crumbled blue cheese from Point Reyes Farmstead Cheese, and a raspberry vinaigrette added finishing touches to the salad.

Andrea Blum Photo
Meanwhile several volunteers chopped onions and garlic, peeled potatoes, and tended three kettles of Stinging Nettle Soup cooking on a propane stove on the back porch. Despite the early rain showers, the day was just getting better with each passing hour. We added a hearty pour of Straus Family cream to the soup and had at it.

Nothing beats tromping around in the woods in search of strange and often maligned plants and then transforming them into culinary marvels amidst a hubbub of wine and cheerful conversation. Coming together to nourish our minds and bodies was the order of the day. These are the basic underlying principles of community.

Photo Andrea Blum
Foraging is often seen as a survival skill, a way for the individual to go it alone in a harsh environment and still prosper. Though I value my alone time for art, contemplation, spiritual renewal, or any number of other things—and have indulged this solitary life for months at a time in the wilderness—at the end of the day I would never renounce my need or desire to be among other people, to share in ideas and joys, to participate in the human drama. For me, foraging is not a path to isolation—it's a way to connect.

I've been supremely disappointed in our U.S. Supreme Court in recent years as it seems to thumb its judicial nose at the very concept of community in America, as if liberty can only be defined as the individual giving the finger to everyone else. Clearly, since our institutions are failing us, it's up to us, the people, to create community—and to hold onto it dearly.

Tuesday, March 27, 2012

Licorice Fern Beurre Blanc

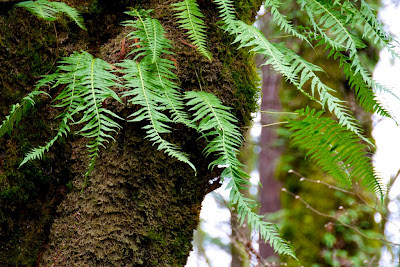
The rhizomes of licorice ferns (Polypodium glycyrrhiza) are at their tender peak right now in the Pacific Northwest. I nabbed a few while hiking the other day.

A rhizome is the root-like base that anchors the fern. Licorice ferns most commonly grow from the trunks and horizontal limbs of old deciduous trees such as big-leaf maples, but they'll also colonize rocks, logs, and other support structures. A network of  rhizomes, often hidden beneath a thick carpet of moss, spreads across damp, forested habitat, sprouting fronds as it creeps along. To harvest, you peel back the moss, locate the rhizome, and gently pull it off its support. A single rhizome can be more than a foot long, with several ferns attached. Native Americans chewed them for their sweet, licorice-like taste and also as a medicinal that was thought to cure ailments such as colds and sore throats.

Licorice ferns are interesting edibles. More and more restaurants are using them to infuse sauces, make teas, or serve candied. The anise-like flavor is apparent when the root is nibbled raw, but in a sauce I find it much more subtle, with a touch of a licorice sensation on the tongue and a hint of sweetness. In general I'd say licorice ferns are more of a novelty, a way to add an exotic touch to a meal.


Broiled Halibut with Licorice Fern Beurre Blanc, Truffle Butter & Root Medley


Halibut just came back into season a week ago and root vegetables are still going strong, though their days are numbered. Even though we had frost on the front lawn the other morning, it looks like the Pacific Northwest is finally waking up to spring like the rest of the country. It was in the sixties over the weekend.

This dish is adapted from a lunch I had at Etta's Kitchen not too long ago, except that Etta's used lingcod and some preserved lemon, and the licorice fern is my addition. It's an easy yet elegant preparation, comfort all the way. The root medley, especially the parsnip and fennel, adds sweetness to echo the licorice fern in the sauce.

Beurre Blanc is a sauce every home cook should know. It's a simple way to gussy up a basic meal of fish or vegetables, and it's suitable for fancier occasions, too. Lately I've been playing with the ingredients and amounts without any of the problems that typically plague other more persnickety French sauces, and I have yet to break one despite experiments with lobster stock, extra wine, lemon juice in place of vinegar, and varying amounts of butter. You can make a butter extravaganza if you like, but I really prefer it a little less creamy.


Cut the root vegetables into 1-inch cubes. I used a parsnip, a turnip, two large carrots, a couple small potatoes, a fennel bulb, and maybe a third of a celery root to make the medley, which I slathered with olive oil and cooked at 375 degrees until tender, about 45 minutes. The root vegetables got plated, bathed in sauce, and topped with a broiled fillet of fish. A pat of truffle butter closed the deal.

The sauce here is a modified Beurre Blanc without the usual butter assault. As mentioned, I like this sauce slightly brothy, though no one would ever call it thin.

1 four-inch licorice fern root, peeled & chopped
1 heaping tbsp shallot, finely diced
1/4 cup champagne (or white wine) vinegar
1/4 cup white wine
1/2 cup stock, divided (chicken, vegetable, lobster)
1 stick cold butter, cut into 8 - 10 sections
2 tsp lemon juice
salt & white pepper

1. Combine fern root, shallots, vinegar, and wine in small saucepan over medium heat. Reduce to 2 tablespoons.

2. Add half the stock and reduce to a few tablespoons. Add remainder of stock and reduce again.

3. Turn heat to low and start adding cold butter one section at a time, whisking frequently. Add another piece when the previous one has melted into the sauce. Don't overheat or sauce will break. You can adjust the consistency by adding more butter or stock. For this dish I prefer it soupy. Finish the sauce with a splash of lemon juice off heat, whisk again, and strain.

Serves 4 modest portions.

Tuesday, March 20, 2012

Razor Clam Linguini

It's been nearly a year since my last razor clam dig. I missed all the nighttime fall digs. Last weekend marked that point in the calendar and tide table when the digs switch over to morning, and on Sunday the moon was kind enough to give us a 9:30 a.m. low tide, which meant a leisurely breakfast in camp after a night of wine and whiskey.

I was with my friends the Coras, immortalized in the morel chapter of Fat of the Land, and had my daughter Ruby in tow. We hit the beach south of Twin Harbors State Park an hour before the turn, bundled up against a cold wind and ready to bag some razors.

The shows on this morning were fairly cryptic. I saw a lot of clammers pacing the flats with near-empty mesh bags. The key was in recognizing even the slightest hint of a show, sometimes no more than the smallest suggestion of a dimple in the sand. Most times, even when I doubted my eyes, I came away with a clam for the effort.

The problem in these conditions is gauging the size of the clams; it was virtually impossible with such minimalist shows. My clams varied widely in stature, though I managed to get a few nice ones, along with more than a fair share that were just average. It's shaping up to be a year of average size from what I've been hearing. Who knows why. Could be ocean conditions, food supply, naturally occurring toxins in the water impeding growth. Or maybe it's just a cyclical thing. I didn't see a single six-incher.


Ruby did yeoman's work reaching into the holes to capture fleeing razors before they dug themselves to freedom. At one point a wave came in and caught me mid-pull. I could only watch as wet sand leaked from my gun and the golden flash of a razor slipped out and into the current. Well, that's not entirely true. I lunged after it, and knocked Ruby over in the process. Even though her fashionable little rubber boots with tattoos of skulls and hearts filled instantly with cold water, we both scrambled after the clam as if dinner depended on it. The razor bobbed up in the surf and then went under again. We knee-walked after it, stabbing at the water with our hands. When I came up with the razor after another mad dash in the waves Ruby cheered. Then she realized she was soaked. End of dig for Ruby.

We got her dried off and comfortable in the van and then I went back out and got my limit. The Coras got their limits soon after, and just like that, game over. Even on the more challenging days the clamming always seems to go by too quickly.

Back home we cleaned our catch and decided a razor clam pasta would be the blue plate special of the day. I'm a huge fan of Pasta alle Vongole. This dish is similar, but because razors need to be exhumed from their shells and cleaned before cooking, you don't get that bonus liquor that makes instant sauce as with hardshell clams. West Coast razors, of course, make up for this shortcoming with unparalleled flavor. I added chopped tomatoes to buttress the sauce. Freshly made pasta is best.

1 1/2 cups razor clams, cut into 1/2-inch pieces
10 oz linguini
1/4 cup butter
1/4 cup olive oil
1 cup onion, diced
4-5 cloves garlic, minced
1 cup white wine
2 cups tomatoes, diced
1 tbsp oregano, chopped (optional)
1 cup parsley, chopped
2 tbsp basil, chopped (optional)
saffron or red pepper flakes (optional)
1/3 cup parmesan, grated

1. In a large sauce pan, sweat the onions and garlic over medium heat in the butter and olive oil. Add wine (I added several strands of saffron to wine half an hour beforehand) and cook for a few minutes, then add tomatoes and oregano and simmer 10 - 15 minutes. If sauce gets too thick, add a splash of water.

2. If using fresh pasta, add the razor clams to sauce when adding pasta to boil; if dried, wait until pasta is half-cooked. The razors only need a few minutes of cooking.

3. Drain and toss pasta in a large bowl with sauce, parsley, and any other herbs. Serve with parmesan.