Wednesday, December 9, 2015

A Taste of Place

I first met travel and food writer Joe Ray a few years ago when the two of us read together at Seattle Lit Crawl. At the time, the New Hampshire native had recently returned from a 10-year stint in Europe and was living on Lummi Island near Bellingham, Washington, absorbing the culinary metaphysics of The Willows Inn and its young chef, Blaine Wetzel, who had lately jumped up on the radar of globetrotting gourmands around the world.

Ray had already logged several months on the island and he was far from finished. We agreed to meet up again on Lummi in the spring, and when the time came, he graciously offered me the spare bedroom in the house he was renting not far from the ferry. "You don't want to drive all the way back to Seattle after dinner," he warned.

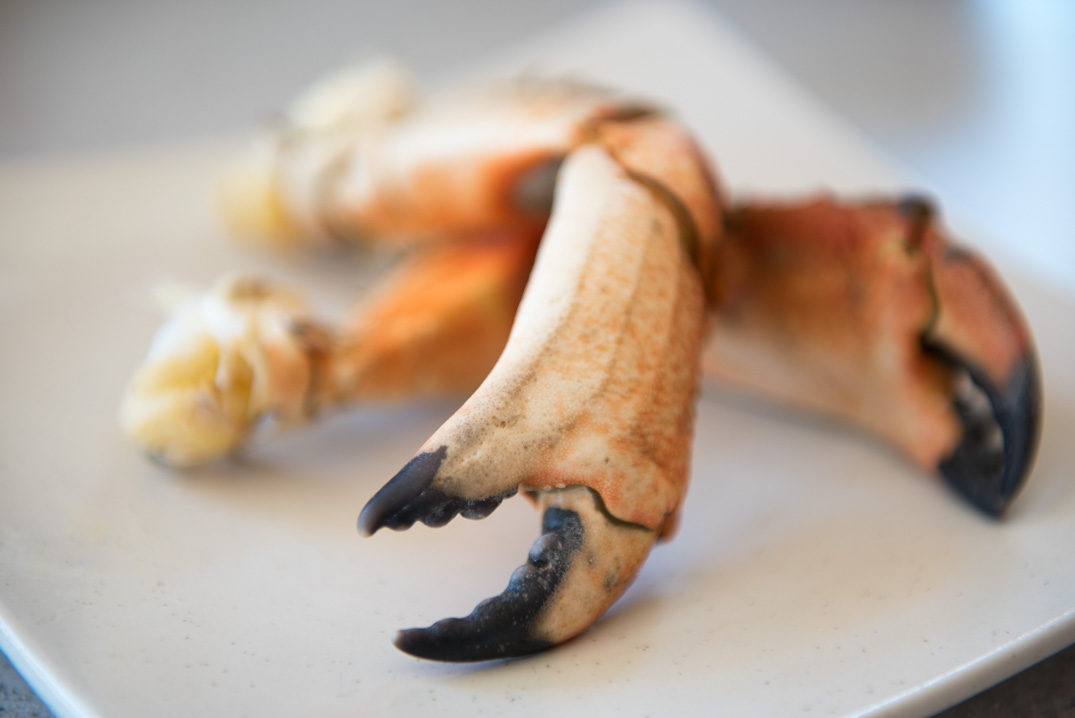
He was right. My wife Martha still talks about our meal at The Willows that night. Dishes included smoked mussels served in a little cedar box with wisps of fragrant smoke escaping from the lid, spot shrimp in nettle sauce with fresh-grated porcini steaming on top, spring lamb festooned with bright green miner's lettuce, and many other inventive takes on regional favorites. Each of the seven courses arrived with the physical trappings of the Pacific Northwest: atop hot stones gathered from a nearby beach; lying across a splinter of Douglas fir from the rainforest; in a clamshell. The Willows is not an overly ornate or fussy place, but its attention to detail—in particular, the details of place—speaks to a deep affection for the region.

Ray's collaboration with Chef Wetzel, Sea and Smoke: Flavors from the Untamed Pacific Northwest, is now out from Running Press. More than just a collection of recipes, the book explores what it means to live and work on an island in Puget Sound, and how the regional identity is expressed in local ingredients and foodways. Sockeye salmon, Dungeness crabs, hazelnuts, matsutake, and Pacific razor clams all make appearances, of course, as do other less expected ingredients: Nootka rose petals, madrona bark, the skin of halibut.

Joe Ray and I are neighbors now in southeast Seattle, so I caught up with him over a bahn mi and a game of pool at Billiard Hoang and asked what brought him cross-country to The Willows.

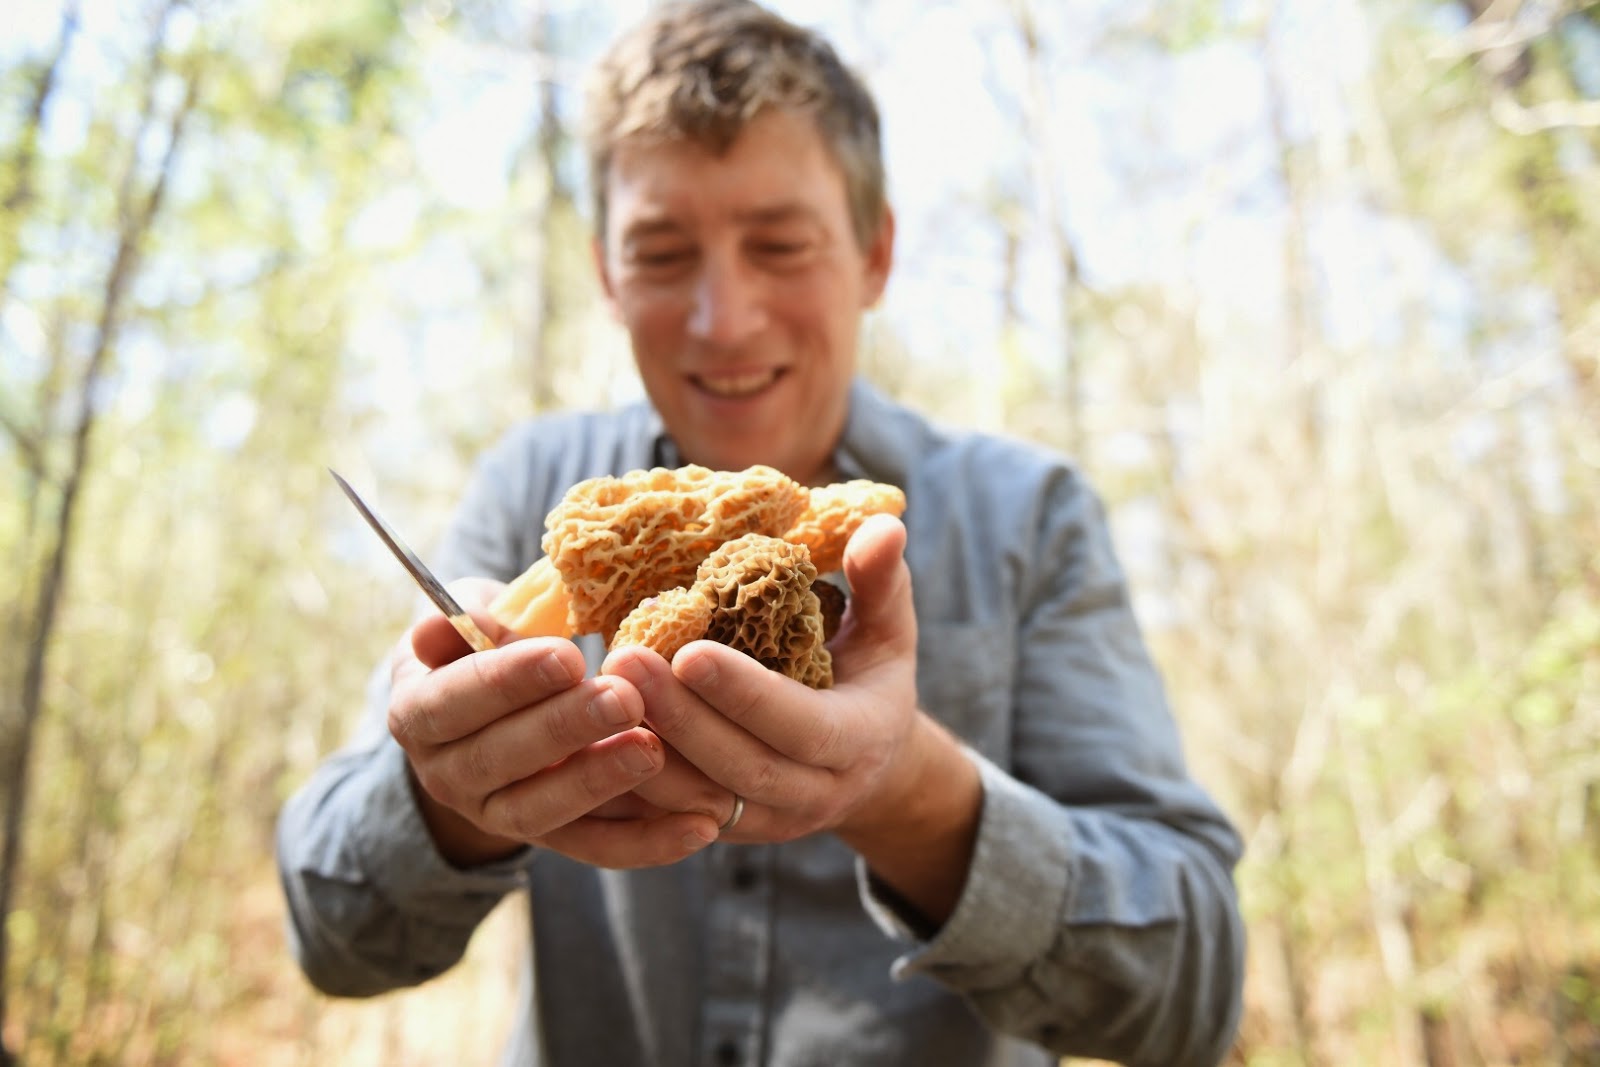
Joe Ray: By chance, I was invited to a wedding at The Willows in the summer of 2010. I met the Inn’s then-owner, Riley Starks, who’s a food lover’s food lover. He farmed, raised chickens, had run a pasta company, ran this great restaurant, and was part owner of a reefnetting operation called Lummi Island Wild—a total renaissance man. I even took pictures of his bookshelf, which featured titles on composting, seed starting, poultry raising, and Tom Wolfe’s A Man In Full. I was so impressed with him that I got my Boston Globe editor on the phone and sold her a story about Riley and the unbelievable setup on Lummi and stayed a few extra days. At some point in there, he mentioned that the “chef from Noma” was coming to be the chef at the Inn. It turned out to be Noma’s chef de partie, a young chef named Blaine Wetzel.

LC: Do you remember your first taste of Wetzel's food?

Ray: Of course! I was still living in Europe, but went back up to Lummi that December and was the first journalist to spend time with Chef Wetzel. In Europe, I’d been lucky enough to eat at several of the world’s best restaurants, including El Bulli, Sant Pau, El Celler de Can Roca, and Noma. Wetzel’s food wasn’t at that level yet, but then again, he was still in his early 20s and it was clear he was on his way. I wanted to tell the story of both the riches they’re blessed with up there and how it all comes together with Blaine in the kitchen to turn The Willows into one of the world’s great restaurants.

LC: You do that colorfully with a series of introductory chapters—vignettes, really—that capture life at the Inn and on Lummi Island. The second half of the book is the recipes. Translating restaurant magic into step-by-step instructions for the home cook is its own art form. Tell us your process...

Ray: The more detail-oriented you can be, the better. For a chef, recipes are often in their heads, with a few hastily scribbled lines in a notebook to jog their memories if need be. In my year at The Willows, I’d be paired with Blaine or one of the other cooks every Friday, all day long, and we’d turn one or two recipes they were cooking for that night's meal for 30 into something that serves 4 for the book. It’s a lot to work through. Something that might require a huge stockpot at the restaurant might only need a saucepan for the book, but I’d be damned if I was going to spend a full year up there and not nail these.

LC: Seriously, though. Is this a book for the aspirational chef or can any home cook reasonably make a meal from it?

Ray: I think it’s a bit of both. This isn’t something full of weeknight meal ideas. At all. This kind of food doesn’t happen quickly, even if you’re a chef. But if you want to make incredible food, like The Willows’ famous smoked salmon, this is how they do it. 

LC: I remember that smoked sockeye! At any other restaurant it would be a centerpiece. At The Willows it was a "snack" in between courses. Frankly, some of those snacks are as memorable as the mains. I see that one of my favorites, Caviar and Crepes, opens the recipe section...

Ray: Yes! Try it!

LC: Any final words of wisdom for home cooks who want to incorporate a sense of place into their cooking?

Ray: Cook the best of what you have access to. The Willows is a great model for this. Yes, they forage, but it’s just a part of it. They’ve also got a farm for fresh vegetables, salmon from Lummi Island Wild, and Jeremy Brown [a local troller], so it’s much more a combination of what’s growing and what's perfect right now.

Author photo by Steve Raichlen; Dried Mirabelle Plum Skins by Charity Burggraaf

Thursday, November 12, 2015

Saffron Milk Caps

The saffron milk cap is a wild mushroom that most pot hunters leave to the Russians. That's too bad because it's tasty and abundant.

Saffrons, or ryzhiki in Russia, are actually a complex of species in the Lactarius genus, and much DNA work needs to be done to separate the North American varieties. They're called milk caps for a latex they exude when cut. Some milk caps bleed white, some yellow, others red or orange.

Eastern Europeans have admired saffron milk caps for eons. I see Russians and Ukrainians in the woods outside Seattle carrying baskets overflowing with saffrons while their competition from other parts of the world is only too happy to leave the milk caps in the duff and fill their own buckets with matsutake or hedgehogs.

Saffrons bleed red or orange. The two most common saffrons for the table are Lactarius rubrilacteus and L. deliciosus (again, these taxonomic names are likely to change with future genetic testing). Both will bruise a greenish color (see photo above), which vanishes with cooking. I found the saffrons pictured here at about 4,000 feet in the North Cascades on the edge of an old-growth forest of mostly hemlock amidst a few patches of snow on the ground. They bled a reddish-orange color (see photo below right), though not profusely, and the green bruising was minimal. Saffrons generally have zonate caps (concentric bands in varying hues of orange, pink, red, or green) but these rings were very subtle in my specimens. As you can see, they also had hollow or partially hollow stems.

Perhaps one of the reasons many pot hunters don't eat saffrons is the difficulty of identifying to species. With most mushrooms that's a no-no—and I'm still not sure exactly what species the pictured saffrons are. Jeremy Faber of Foraged and Found Edibles confirmed that he sells this species as a saffron milk cap and that, if not L. rubrilacteus, it's a close relative. He also said that saffrons will bleed less during heavy rains.

Saffron milk caps are versatile in the kitchen. My pal Hank Shaw, in a nod to Eastern European foodways, preserves them in salt. Sautéed, saffrons keep their salmon color and firm, almost crunchy texture.  Some mycophagists have complained of graininess, but prolonged cooking eliminates this. The key to using saffrons is taking care of them in the field and then using quickly at home. These mature milk caps pictured, though completely bug-free, were more suitable for the pan than pickling due to their large size. The green bruising isn't appetizing, but as I said, it disappears with cooking.

Recently I came across a mushroom cookbook with some excellent non-cheffy recipes for the home cook, The Edible Mushroom Book. The recipe that follows is adapted from that with a few tweaks.

Pan-fried Chicken with Saffron Milk Cap Ragout

3 - 4 chicken thighs, skin on
1/2 lb saffron milk caps, cut up
2 shallots, diced
1 - 2 cloves garlic, crushed
2 tbsp vegetable oil
2 tbsp butter
1 cup white wine
1 cup chicken stock
1/2 cup heavy cream
2 - 3 fresh sprigs fresh thyme
salt and pepper

1. Pre-heat oven to 400 degrees. Pat dry chicken and season with salt and pepper. In a medium saucepan, heat oil over medium-high and pan-fry, skin side first, until golden, a few minutes on each side. Remove to an oven-proof dish and continue cooking in oven until juices run clear, about 20 minutes.

2. In same saucepan, melt butter and sauté diced shallots until soft and translucent. Add mushrooms, thyme, and crushed garlic and continue cooking together a few minutes. Season with salt and pepper.

3. Deglaze pan with white wine and reduce by half. Add stock and heavy cream and reduce until desired consistency. Spoon mushroom sauce on plates and then place chicken atop sauce.

Serves 2


Thursday, October 29, 2015

Wild Mushroom Strudel

A couple weekends ago, while attending the Sunshine Coast Mushroom Festival in British Columbia, I got a bite of a Wild Mushroom Strudel and immediately vowed to make it at home.

First, though, I had to find the mushrooms. So I visited a regular patch on my way to Yakima to speak to the Yakima Valley Mushroom Society. It's a patch frequented by Eastern Europeans, especially Ukrainians, who pick a variety of different Leccinums including what they call "redcaps" (possibly Leccinum aurantiecum, though we're likely to see taxonomic changes in North America with further DNA testing). They leave all the matsutake, which happily went into my bucket, along with several gypsy mushrooms and a fat porcino of more than a pound that remarkably perched in the duff unscathed. When I got home, the gypsies and king bolete went into the strudel.

I've never made a strudel before. For this reason I kept things simple and bought frozen puff pastry from the store. You're welcome to make your own. A couple notes: braiding the puff pastry makes for an attractive presentation and allows air to escape through the vents so that the strudel doesn't blow up into a monstrosity. Dried porcini, though not mandatory, gives the strudel a deep mushroomy flavor. You need less of the mushroom mixture than you think. My next strudel will have a bit less than the one pictured here.

3 cups diced wild mushrooms
1 oz dried porcini (optional)
1 large shallot, diced
2 tbsp butter
olive oil
2 - 3 springs fresh thyme, de-stemmed
1/4 cup white wine
1 handful parsley, chopped
salt and pepper
1 sheet puff pastry
1 egg, beaten

1. If using dried porcini, pulverize in a food processor and rehydrate with 1 cup warm water. Set aside for 20 minutes.

2. Saute diced shallot in butter over medium heat until soft. Add diced mushrooms. Cook mushrooms and shallot together for several minutes. The mushrooms will soak up all the butter; add olive oil if necessary. When mushrooms begin to brown, deglaze pan with a splash of wine. Add mushroom stock and reduce until the mixture is moist but not wet. Stir in thyme and parsley. Season with salt and pepper to taste. Remove from heat.

3. Pre-heat oven to 350 degrees. Roll out puff pastry into a rectangle about  12 inches by 8 inches. Place pastry on a piece of baking parchment atop a cookie sheet. With a knife, make diagonal cuts to the edges of the two long sides, so that the pastry can be folded up in a braided pattern. Spoon mushroom mixture down the middle. Fold up the strudel and pinch the ends. Brush with eggwash and place in oven. Bake until golden, about 30 minutes.


Friday, October 2, 2015

Halibut with Cauliflower Mushroom & Root Vegetables

It's another dry fall in the Cascades. The new normal. Even so, mushrooms are up if you know where to look. I visited one of my favorite mountain porcini spots the other day only to find a parched landscape with nary a cap or stem in sight. This is why a mushroom hunter needs a diversified portfolio of patches. The next spot, lower in elevation, with taller trees, a nearby watercourse, and more moisture, paid off. I also found a smallish cauliflower mushroom, the prize of the day.

The cauliflower mushroom, genus Sparasiss, is one of my favorites. It looks like something that should be growing on the sea floor, not in a forest, and it's one of the best tasting of all the wild fungi.  The mushroom grows from the duff at the base of trees, old-growth Douglas fir in particular where I live. When you find one, make sure to cut it off at the base with a knife. I try to leave some behind to finish sporulating.

If there's one drawback to Sparasiss, it's cleaning them. All those ruffles and folds collect dirt and pine needles as the mushroom emerges from the ground—forest litter that's difficult to remove. I run the mushroom under a strong tap and try to get as much off as possible, then slice into smaller pieces and wash those as well.

Cauliflower mushrooms are among the tastiest of our wild edible fungi, and in the kitchen they can be used in all sorts of ways. I braise, pickle, and sauté them. They're especially good in a mushroomy broth. You can cook them for hours, infusing your other ingredients with deep fungal flavor, yet they still retain their al dente texture.

This is the sort of dish that would have intimidated me when I first started cooking and now is second nature. The different elements are bound by an intensely flavored yet soupy sauce of butter, chicken stock, and mushroom.

2 portions halibut fillet
1/2 lb cauliflower mushroom, cut into pieces
4 tbsp butter, plus extra
1 shallot, diced
1/4 cup white wine
2 cups chicken stock
1/4 lemon
root vegetable medley, julienned
olive oil
salt and pepper
parsley garnish

1. Pre-heat oven to 375 degrees. Peel and cut root vegetables into equal shapes and sizes. Mine were twice the size of matchsticks, with a mix of celery root, purple yam, parsnip, and carrots, enough to cover a small roasting pan. Brush on olive oil and roast in oven, cooking for minimum 1/2 hour, tossing and seasoning with salt and pepper at least once.

2. While root vegetables are roasting, heat a large sauce pan on medium-high and melt 2 tablespoons butter. Sauté diced shallot for a minute or two and add mushrooms. They'll soak up the butter quickly, so be ready to add more butter or olive oil. Once the mushrooms have reduced in size and started to brown on the edges, add a splash of wine to de-glaze. Now add 1/2 cup chicken stock and cook that down, adding more stock as the broth reduces and starts to thicken, repeating until the broth is soupy and flavorful, 15 minutes or so. Squeeze in a quarter lemon. Before serving, stir in remaining 2 tablespoons butter.

3. When mushroom broth and root vegetables are nearly done, heat a non-stick pan on medium-high, grease with olive oil, and pan-fry halibut. Season with salt and pepper as you cook and add a little butter. Depending on thickness of fillets, cook each side for a few minutes until the fish is golden on the outside and opaque yet flaky tender inside. Spoon mushrooms and broth into bowls, cover with root vegetables, and top with fish. Sprinkle over a pinch of chopped parsley.

Serves 2


Monday, August 31, 2015

Ikura

With nearly 7 million pink salmon forecasted to return to Puget Sound rivers this year, just about everyone I know has been hitting the beaches with pink fever. Earlier in the month I spoke with David Hyde at KUOW about the many charms of pinkies, traditionally the least appreciated of our five Pacific salmon species. Since then I've nearly filled my catch card—and the freezer—with a year's supply of smoked salmon.

Today I searched this blog for a salmon caviar recipe and was surprised I'd never posted one. I've been curing salmon roe for years, ever since my pal Beedle (of Fat of the Land fame) showed me how more than a decade ago. Alas, it's been a year since my last caviar session and Beedle's notes have gone missing, so I took to the Web—and I'm glad I did.

I found this post by someone named Marc at No Recipes. To separate salmon eggs from their skeins, I've always used the warm water method. Though it works, it's messy and time-consuming, and the act of picking out all those nasty little bits of skein deserves to have its own ring in Hell. Instead I gave Marc's method a try...and I'm here to tell you it works. I found a wire cooling rack, the sort you might use for cookies hot out of the oven, and placed it over a large mixing bowl. Next I opened up the skeins and ran them back and forth over the rack. The eggs fell easily into the bowl. Besides doing the job quickly with minimal wastage, the process is an object lesson in the durability of salmon eggs. They're tough! Nature takes care of its own, if we let it.

After separating the eggs, I rinsed them in a wire mesh strainer with cold tap water and then adapted Marc's recommended ikura recipe rather than making my usual salt brine. Because I was using smaller pink salmon skeins, and because I didn't have any sake on hand, I halved his recipe and used aji-mirrin in place of sugar and sake.

3/4 cup dashi *
1 tbsp soy sauce
1 tbsp aji-mirrin
2 tsp kosher salt
2 small skeins salmon roe

* For making homemade dashi, see my post on Oyster Mushroom Udon.

1. Peel open egg skein with fingers. Separate salmon eggs from skeins by rubbing the open end of the skein across a wire cooling rack.

2. Mix curing ingredients together in a bowl and add the eggs. Refrigerate overnight, curing from 12 to 24 hours.

3. Drain. Ikura will keep in a refrigerated glass jar for several days.

I've eaten variations of salmon caviar and ikura made from every species of Pacific salmon. They're all good. Chum salmon eggs are especially beloved in Japan, but pinks have their own merits. The briny goodness of cured salmon eggs popping in your mouth is one of the great culinary delights—and a good reason to go catch a salmon.


Monday, July 6, 2015

Rock 'n' Roll

Seattle is bursting at the seams. Growing pains are being felt in all sorts of ways. Besides the traffic, an increase in fishing pressure is not just the stuff of grumbling old salts at the local. Take crabbing. According to the Washington Department of Fish and Wildlife's web site, "Catch estimates for Puget Sound as a whole show that recreational [crab] harvest more than doubled from 1996 to 2005." I can only imagine what the last ten years show.

The good news is that lots of people are getting outside and connecting with their natural heritage; the bad news is that this means shorter seasons, smaller bag limits, and increased competition. Fish and Wildlife manages the fishery carefully so that the tribes, commercials, and sports all get a piece of the action. In part, the agency depends on ever more accurate data to effectively balance the quotas, which is why crabbers now must purchase a crab endorsement (it cost me $8.75 the other day) in addition to a license and return a crab catch record card at the end of the season, just the way you would for salmon and steelhead. Then the number crunchers take over.

Summer crab season opened this past week for much of Puget Sound. I suppose I should feel lucky that I got a few. My usual spot was swarming with scuba divers. Every year their numbers increase. Out beyond the scuba crowd, a phalanx of small boats was busy dropping pots. On shore, guys were using spinning rods to cast miniature crab traps (the traps, about the size and shape of a suet bird feeder, are baited and rigged with loops of fishing line to snare the crabs). It was crabpalooza out there!

Meanwhile, a free diver such as myself just has to hope he can find some crabs in between the scuba crowd and the bank anglers.

It wasn't easy. I had to get resourceful. I only nabbed a single keeper Dungeness (a couple others were just shy of the 6 1/4-inch size limit and got tossed back). For the first time ever I decided to keep some good-sized rock crabs (pictured above and below). The size minimum is 5 inches across the carapace and these measured 6 inches, which is decent. Rock crabs have less meat than Dungeness, but they have large claws and their meat is sweet and delicious. And while rock crabs aren't as good as Dungies for a West Coast crab feed—their shells are thicker and require more effort to pick—they're still really tasty.


New England has the Lobster Roll. Out here on the Left Coast, we have the Dungie Roll—unless you want to take advantage of an underutilized seafood and treat yourself to a Rock 'n' Roll.

3 large rock crabs, shelled
4 soft French rolls or hot dog buns
1 cup shredded lettuce
1 thinly sliced tomato
1 dollop mayonnaise
1/4 cup diced celery tops (the leafy parts)
1 green onion, thinly sliced
1 heaping tbsp chopped parsley
squeeze of lemon
seasoning, i.e. paprika, white pepper, salt

Gently mix together the crab meat, mayonnaise, diced celery, green onion, parsley, lemon juice, and seasonings. Lightly toast French rolls or hot dog buns, slather with mayo, and assemble with shredded lettuce, sliced tomato, and dollops of the crab salad. I had to use hamburger buns from the Columbia City Bakery because they were sold out of hot dog buns and potato rolls—my bad for waiting until 4 p.m. on July Fourth to go bread shopping.


Wednesday, May 20, 2015

Bouillabaisse, Northwest-style

Fish stews—bouillabaisse, cioppino, chowder, bisque, fish head soup, and so on—are some of my favorite meals. Don't let the authenticity police scare you into passing on such hearty and satisfying fare. These dishes are meant to be simple, to let the ingredients speak for themselves, even when we gussy them up with pretension.

In Marseilles, partisans have been arguing over the ingredients and presentation of a proper bouillabaisse for as long as anyone can remember. Ignore the guy who tells you you're doing it wrong if you don't use a freakin' rascasse fer chrissakes. (The rascasse, also called a scorpionfish, is a Mediterranean species often used in bouillabaisse…in southern France.) Nor do you need to serve it in two courses, with rouille.

The point of dishes like bouillabaisse or cioppino is to use whatever is fresh and on hand. In fact, I'd bet the origin of these dishes is probably less palatable than many would like to believe. The fish were probably those left unsold by the fishmonger or on the verge of being…shall we say…less than perfectly fresh. Perhaps they were bycatch on the boat, the sort of fishes that wouldn't earn the fishermen any money. Into the stew pot they went, along with whatever else was lying around: onions, garlic, tomato, maybe a fennel bulb.

Since it's the 21st century and most of us won't be cooking this dish on board a fishing vessel at an ungodly hour in between sets, we needn't worry about making use of deck flotsam. We should try to find the best, freshest fish available wherever we live. I happen to live in the Pacific Northwest, not on the Mediterranean, so it makes sense to use local Puget Sound shellfish and cold-water finned fish from the North Pacific. I was in Cordova, Alaska, last week for opening day of the Copper River salmon season. Instead of bringing home a box full of sockeye or king like everyone else on my Alaska Airlines flight, I nabbed me some halibut, which yielded four beautiful fillets and a carcass begging to be used for stock. (The salmon was too valuable as income for my hosts to give away.)

A mix of fish makes a more interesting bouillabaisse. Along with the halibut, I added Alaskan rockfish, Penn Cove mussels, and shrimp. Other choices in my region might include lingcod, Pacific cod, pollock, flounder, Dungeness crab, manila clams, and spot shrimp. You could use salmon, but the strong and distinctive flavor would overwhelm the other ingredients. My nods to tradition included fennel, saffron, and orange zest, though I didn't bother with leeks or Pernod (though a licorice fern infusion could have given it that extra touch of anise flavor).

You can use store-bought fish stock or clam juice, but a homemade stock is best—a good excuse for buying that whole fish at the market and saving a bunch of money by filleting it yourself and using the scraps for stock.

Stock

1 (or more) white-fleshed fish carcass (enough to fill bottom of pot)
1/2 onion, chopped
1 carrot, chopped
1 or 2 celery ribs, chopped
1/2 cup white wine
1 bay leaf
2 sprigs thyme
1 handful parsley, chopped
salt and pepper

Cover fish carcass (in this case, halibut) with water. Simmer for 10 minutes. Add onion, carrot, celery, white wine, bay leaf, thyme, parsley. Simmer together another 20 minutes, until fish flesh is easily separated from the bones. Add more water if necessary. Season and strain. Yield: 1 quart.

Bouillabaisse


2 tbsp olive oil
1 small onion, diced
1 small fennel bulb, thinly sliced
3 cloves garlic, minced
1/2 cup white wine (or splash of Pernod)
2-3 cups tomatoes, cut up
1 pinch saffron
1 pinch hot red pepper flakes
2 tsp orange zest
1 quart fish stock (see above)
3-4 lbs assorted white fish fillets cut into pieces and shellfish
1 handful parsley, chopped

In a pot, heat olive oil over medium heat and sauté onion and fennel until softened. Deglaze with a splash of white wine. Add garlic, tomatoes, saffron, pepper flakes, and orange zest. Raise heat to medium-high and cook together a few minutes. Stir in 1 quart fish stock and bring to low boil. Add fish fillet pieces and cook several minutes (depending on thickness). Note: if using a mixture of firm fish and softer fish, add in stages to allow even cooking. Lastly, add shellfish and cover. When the shellfish are cooked, stir in parsley and remove from heat. Ladle immediately over crusty bread (optional: toast bread and rub with cut garlic). Serves 4.


Friday, April 24, 2015

Southern Morels

The Southeast has intrigued me for a long time for its diversity of plants and fungi, a diversity I'd mostly read about in books.

The last time I'd spent any significant amount of time in the region was twenty-five years ago, during a spring break from college that involved some sketchy camping and maybe a little foraging for beer. Earlier this month I had a chance to visit again and speak to mushroom clubs in Georgia, South Carolina, and North Carolina. Though fungal diversity was nowhere near what it will be come summer, the spring wildflowers were out—and so were the morels.

Aside from the pesticide-laden morels that fruit in California's olive orchards in late winter, Georgia represents the beginning of morel season for many a roving hunter in the U.S. It was April 1 when I set forth on my first hunt in the Goober State, and I didn't come away with any fool's gold—just this big fat yellow below, a Georgia peach of the fungal variety.


The habitat was so different from what I'm used to in the West. Along with members of the Mushroom Club of Georgia, we scouted river bottoms, looking for concentrations of green ash. One spot within the Atlanta Metro area, filled with dog-walkers and picnickers, delivered in spades. Meanwhile, I was trying to wrap my head around all these hardwood trees that were just beginning to leaf out. Oaks and hickories, buckeyes and magnolias—too many to count, much less identify.

And like the trees, the morels were different too. Depending on which taxonomy you're following, they carry the scientific name Morchella americana or Morchella esculentoides. Most people call them yellows. I don't see them very often in the Pacific Northwest, though they do fruit in a few cottonwood bottomlands in select locales.

Another difference with eastern morel hunting: the beasties. I became fanatical about checking myself for ticks. I have friends who have gotten Lyme's disease and it's no fun. One of the little buggers managed to get its teeth into me and now I'm keeping tabs on the wound, hoping it doesn't grow into a bull's-eye.

The other hazard is from the plant kingdom: poison ivy. The nasty stuff was all over the woods, and at one point while I was taking a breather, leaning casually against one of the many bewildering, unidentifiable hardwoods, my companion suggested I might want to remove my hand from the thick vine of poison ivy that was trellising up the trunk. Doh!


While in Atlanta, I also loaded up on some of the local cuisine. Georgia Organics hosted an amazing dinner that featured some of the city's notable chefs. And if you're a Sichuan geek like me, you'll want to run—not walk—straight to Masterpiece restaurant in nearby Duluth. I can easily say it was the best Sichuan I've had since going to Sichuan Province back in the summer of 2011 (don't miss the dry-fried eggplant or the chicken with a bazillion hot chilies).


In South Carolina, my next stop, I visited Mushroom Mountain, where cultivator Tradd Cotter is growing enough mushrooms, such as these elm oysters pictured at right, to interest Whole Foods. As for the wild ones, the yellows that I found were much smaller and grew mostly with tulip poplars. Locals call them tulip morels. Cryptic and incredibly hard to find (see below), they hid among the leaf litter, often barricaded by poison ivy. With help from the South Carolina Upstate Mycological Society, affectionately known as SCUMS to its members, we sleuthed them out, again in river bottom woods.

The Asheville Mushroom Club in North Carolina was my last stop, but we snuck over the border into Tennessee for morels, where we found the tulip variety as well as my first eastern black morels, pictured below, which proved tricky to spot given all the fallen leaves.


We hunted an area on the edge of Smoky Mountain National Park, where trillium, violets, trout lilies (pictured above) and other wildflowers were in full glorious bloom. The Smokies, I'm told, hold the highest plant biodiversity in North America. Whereas we have one species of trillium in the Pacific Northwest, the Southeast has forty!

Next time—and there will definitely be a next time—I'm returning with my backpack and tent so I can disappear into the Smokies or the Blue Ridge for a spell. Brook trout with wild mushroom stuffing, anyone?


Monday, April 13, 2015

Clay Pot Bulgogi with Wild Greens

The other day I scouted some of my early morel spots to see if there might be anything starting to pop, given the ridiculously mild winter we've had in the Pacific Northwest. But no, nada. Seems like the fruiting schedule of morels in my area doesn't vary much more than a week no matter how much snow falls in the mountains, although pickers down in Oregon have been talking about morels coming up two weeks earlier than usual in some of their patches.

Nevertheless, I came away with something nearly as good for my effort: wild watercress. Watercress is one of the first spring greens of the season, and depending where you live, it often has a second act in the fall. No doubt there are patches in Northern California that produce much of winter. As I plucked the tender leafy shoots, I already knew what I'd be making.

I mostly use my Korean clay pot for Soondubu, but after ordering a dish simply called "Beef Stew" at a local lunch joint recently I realized it was time to branch out. Unlike a typical American beef stew that requires hours of slow cooking, the Korean version can be whipped together in minutes if you marinate the meat in advance. And the presentation in the clay pot earns extra points. Like those miniature cast iron skillets you see in restaurants that make such a cool presentation of clams or mussels, clay pots are used for both cooking and serving.


With a little prepping, this bulgogi stew is easy. It's essential, however, to marinate the beef for at least an hour beforehand (overnight is even better). I've used various marinade recipes for bulgogi and kalbi ribs over the years, including Bittman's simple version. More traditional recipes call for an Asian pear to help sweeten and tenderize the meat, as in this recipe, although other recipes omit the fruit. As it happens, my local butcher sells thin-sliced beef trimmings already marinated.

A typical clay pot bulgogi will have some sort of leafy green vegetable such as spinach stirred in at the end; this one owes its vibrant color to the wild and very nutritious watercress that's leafing out across much of the country right now.

1/2 pound marinated bulgogi, preferably thin-sliced ribeye (see marinade recipes above)
1/2 small yellow onion, cut into thin slices (add to marinating meat if desired)
1 cup water
1 cup beef stock or dashi
1 handful cellophane sweet potato noodles, about 5 oz
1 green onion, sliced
1 handful fresh wild greens such as watercress, bittercress, dandelions, lambs-quarters
Other optional ingredients: shiitake or enoki mushrooms, sliced carrots, egg

1. Add cellophane noodles to a bowl of warm water and set aside for 20 minutes.
2. Heat clay pot (or conventional pot) over high heat, then add beef and onions and stir-fry a couple minutes until the meat is lightly browned.
3. Add water and stock. If using a clay pot, leave enough room for noodles.
4. Once boiling, stir in pre-softened noodles and cook until tender.
5. When noodles are ready, stir in wild greens and green onion and remove from heat.

Serves 2 with rice.

Monday, March 30, 2015

Voracious Tasting & Food Awards

UPDATE: We have a winner! Stinging Nettle Spanikopita. This is a recipe I've been meaning to try for a while and the author provided a detailed, if slightly improvised, recipe. I'll post it in the future. Lots of other great ideas, including Nettle Raita, Nettle Larb, and Korean-style Nettle Salad. Thanks everyone for playing!


The Seattle Weekly's 6th annual Voracious Tasting & Food Awards will be held on April 23 at the Paramount Theatre in downtown Seattle. I've been to a few of these in the past and can say without reservation it's a chowhound's night.

Presented by the Washington State Beef Commission, doors open at 7:30 p.m. (6 p.m. for VIP ticket holders) with bites and booze from scores of Seattle's favorite chefs and mixologists.

The nice folks at Voracious food blog have given me a pair of tickets to give away. Since this event has become a regular spring fling, let's celebrate the season. Comment below with your favorite recipe for stinging nettles. I'll choose a winner based on my own very subjective taste (bonus points for a nettles recipe I want to make myself).

Tuesday, March 17, 2015

Wild Greens Workshop

It's that time again for those of us on the West Coast. The woods and meadows are waking up. Wild greens—tasty, nutritious, free—decorate the woods and forest fringes.

To ring in the spring harvest, I'll be teaching a foraging and cooking workshop at Heyday Farm on Bainbridge Island on March 27, with a focus on wild spring greens, especially stinging nettles. As I've said here before, nettles are the backbone of my spring foraging. I use nettles in soups, pastas, and sauces, and I put up large quantities of nettle pesto to have on hand year-round.

At Heyday, we'll spend the morning foraging in the woods around the farm, learning about and harvesting what’s in season. Back at the historic Heyday Farm kitchen and farmhouse, we'll learn several ways to pair and prepare our catch. The class will include a satisfying lunch. Cost is $110. Please sign up through Bainbridge Island Parks and Recreation, or by calling (206) 842-2306.


Thursday, January 29, 2015

Smoked Salmon Candy

Last week I was forced to play the bi-annual standup freezer defrosting game. My freezer cost me zero dollars to haul away from some guy's basement, but you get what you pay for, and in this case it has a couple dents in the upper left corner that prevent a perfect seal when the door is closed, and though I solved this problem with stick-on insulation strips, over the course of a year or two, ice gathers in this corner until it overwhelms the whole freezer ecosystem and the entire thing begins to accumulate a layer of snowy frost.

The defrosting requires multiple pots of boiling water to steam out the ice and a little chiseling with a claw hammer. Meanwhile, all my wild food waits patiently in four coolers before it can be re-stacked in the freezer.

This is a good opportunity to take stock. I found frozen packages of stinging nettles from 2010; into the trash they went, sadly. The half-quart tubs of salmon stock went happily in the trash; frozen salmon stock is nasty, friends, and the fresh stuff isn't much better, I've decided, with only limited applications.

Speaking of salmon, I've got more than a hundred pounds of kings, silvers, and pinks in the freezer, mostly kings from some very successful fishing trips on the Oregon Coast this summer. I went through my vacuum-sealed packages and found a few with air pockets and less than ideal seals. These had developed some frost inside, and I could see the beginnings of freezer burn. Time to make smoked salmon candy.

5 lbs salmon collars, bellies, or fillets cut into strips

Dry brine:
1 cup pickling salt (or regular, non-iodized)
4 cups dark brown sugar

Glaze:
1/4 cup maple sugar
2 tbsp dark brown sugar
1/4 tsp kosher salt
1/4 cup Grand Marnier

1. Mix the dry brine. My standard brine is a 1:4 ratio of salt to brown sugar for a 12 hour brine. Often I'll add a whole head of chopped garlic and fresh ground pepper to this, and sometimes other spices as well. For salmon candy, I keep it simple: just salt and dark brown sugar.

2. Prepare the salmon. Remove pin bones with pliers and cut fillets into strips (with a large chinook, my strips are 2 to 3 inches wide).

3. Pack the salmon pieces with dry brine in a non-reactive (e.g., Pyrex) dish, skin up for a single layer. If stacking fish in more than one layer, place first layer skin down and second layer skin up, so the fish is flesh to flesh, why the dry brine packed between. Brine overnight or 12 hours. The brine will be soupy by the end.

4. Remove salmon pieces from dish and rinse with cold water under tap. Place skin down on wire racks to dry for 2 to 4 hours. Don't cheat on this step. It's important to let the fish dry and firm up; the exterior should be tacky, not wet. A pellicle forms, which helps retain moisture and flavor during the smoking process. I speed up this step up with an electric fan, but it still takes at least a couple hours.

5. Smoke the salmon in your usual way, low and slow if possible. I use a Weber Bullet, which is a hot smoker, meaning the heat from the fire and not just the smoke contributes to the cooking and smoking process, so I try to keep my bed of coals fairly small and heavily damped down. The temperature ranged from 125 to 150 degrees for the first three hours, and then 100 degrees for the last two hours. Cherry or apple wood is good (I used apple this time). A long, low smoke is preferable, especially for candy. While the fish is smoking, brush on glaze periodically, once an hour or so.

Tuesday, January 13, 2015

Abalone Sushi

Happy new year, everyone. As you can see, FOTL has taken a vacation since early November. But that doesn't mean we haven't been out there, reveling in the wild bounty.

As in past years when the days turn dark and rainy, I made tracks for the promised land. This time, unlike previous trips in recent memory, the promise was fulfilled: what an extraordinary winter fungi harvest in California. Just add water! as they say. The beleaguered mushroom hunters of the Golden State, pummeled by drought, are seeing the sort of season mostly remembered by old-timers, and all it took was a well-timed spot or two of precip.

I suppose this is the new normal in our era of climate weirding.

I was fortunate enough to join fungus seekers in the Woodlands of Mendocino, a quiet camp among the redwoods about 10 miles inland from the Pacific, where members of the Mycological Society of San Francisco and other local mushroom clubs hold an annual weekend-long foray. And the timing couldn't have been better. The mushrooms were (and are) popping with abandon. Even now, a couple months after my trip, friends continue to text me photos of enormous matsutake hauls. Porcini started fruiting on the coast as early as September, and black trumpets are having a banner season (not to mention the beautiful specimen of western grisette, Amanita pachycolea, pictured at left). I guess the mushrooms figured they better sporulate while the opportunity presented itself. Collectors in camp brought back queen boletes, oysters, hedgehogs, golden chanterelles, even candycaps, another early pop.

But this post is about snails. After the Woodlands Foray, I joined my friends Curt and Carol on the coast for a night of eating from the sea. Earlier that day they had donned wetsuits to wrangle up some abalone and lingcod. This was my first time really getting serious with abalone. After pounding the meat, Carol sliced it thinly and served a first course of sashimi. The second course was an amazing ceviche. For the third course, strips of abalone were sautéed in a creamy sauce with capers and lemon. The final dish was lingcod broiled with tomatoes and garlic.

As a parting gift, they gave me a coveted chunk of ab. Into my mushroom bucket it went, covered in ice for the 14-hour drive back to Seattle. Once home, I prepared a simple sushi dinner. This is a taste that isn't exactly easy to come by, especially outside Northern California, and I wanted to let it stand on its own. Abalone are carefully regulated by California's department of fish and wildlife, with good reason; they're easily overfished, and poachers continue to be a problem. The flavor is mild, slightly sweet, with a butteriness that's unusual in shellfish. Served raw as sushi or sashimi is a perfect way to allow the subtle taste to fully express itself.

One of these days I'll have to slip into the chilly waters of the North Coast myself and pry an ab from the rocks. Eat a few slices of abalone and you'll understand why divers take their chances in waters patrolled by the great white shark.